Time needed: 6 hours
Let’s say you’re out with the family on a backcountry camping trip. You are driving to a secluded spot that hardly anybody knows about, and the fan belt breaks. What are you going to do now? This would not have happened if you had replaced it at home, but how could you tell it was about to break? This is what learning preventative maintenance is all about. It goes way beyond just an oil change and grease job. If you know what to look for, you can save a lot of grief.
Maintenance Check List
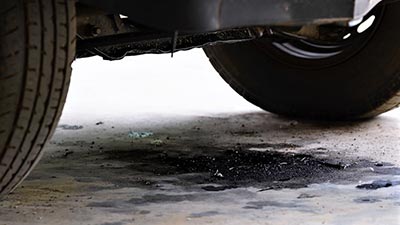
Let’s start with the basics. A checklist is a way the Pros do it, and that is just what you should do. You don’t have to be a mechanic to do simple repairs to your ride, but you do need a basic understanding of how things work and what they do on your vehicle so you can spot a problem before it causes a breakdown. Common sense has a lot to do with preventative maintenance. For example, if you see a spot of fluid on the driveway, you would find out where it was coming from and either repair the problem or take it to a mechanic for repairs before it is a real problem. There are other not-so-obvious things to look at on your vehicle that I will show you.
-
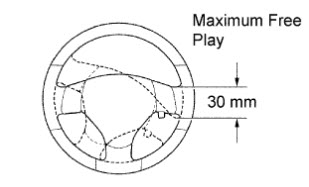
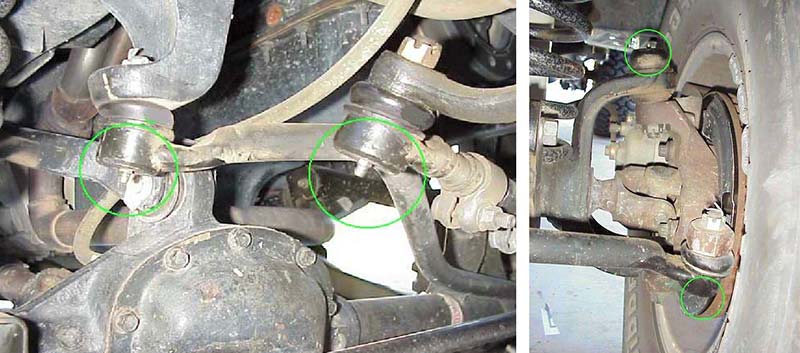
Steering wheel free play

Let’s do a P.M. As you move down your checklist, markdown to the side of each step either a check to indicate no problem or make a note of any problems found. Start with the steering wheel. Check for any looseness in the steering system. Looseness in the steering is gradual, so it’s easy to go unnoticed. In case you have power steering, run the engine while you turn the steering wheel from side to side. Observe the front tire while turning the steering wheel. There should be no more than 2 1/2″ of play from side to side before you see the tire move. In case there is, it indicates a bad joint or the steering gear requires adjusting. Anyway, a thorough check is necessary so that repairs can be made. -
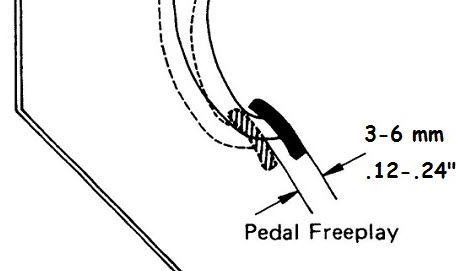
Clutch pedal free travel

With a manual transmission, you should also check the clutch for free travel. When the clutch wears from use, free travel is taken up. The clutch could become partially disengaged all the time if not adjusted, and this will result in premature clutch failure. Most of the newer vehicles come with automatic adjusters, so you should check your owner’s manual in the first place. If the clutch starts to disengage the moment you step on the clutch, the linkage requires adjusting to give some free travel. This is the distance from the top of the pedal when you step on it to the point where it starts to disengage the clutch. The distance should be about one inch. -
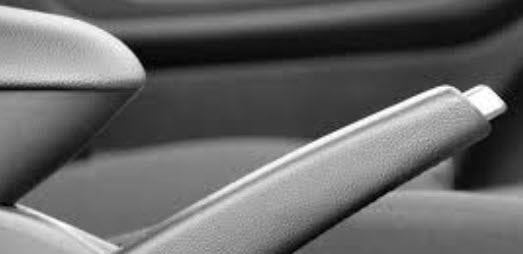
Parking brake

Mostly, the parking brake requires adjustment because of normal brake wear. There are two main types of parking brakes used. One of them uses a separate brake assembly on the output of the transmission. While the other uses mechanical linkage to apply the rear brakes. You might have either a small pedal pressed with your foot or a hand lever. In any case, the parking brake should be fully set at half the distance the pedal or lever is pulled. The parking brake should also be fully released when the pedal is. The best place to test the parking brake is on a hill to make sure that it holds. In case there is too much pedal stroke, the parking brake should be adjusted. Check the owner’s manual for the precise procedure or ask a mechanic to adjust it instead. -
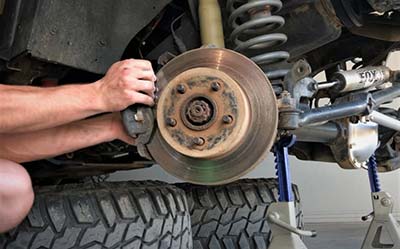
Service brakes

Now, you should check the service brakes or main braking system. With the engine on the step on the brakes, they should not go further than halfway to the floor, but some brake systems will allow the pedal to go the closest to the floor with a lot more force than you would use even during an emergency stop. Should you have any doubts, you should ask a mechanic to check it for you. If it moves too far, this could indicate the brakes require adjusting. With a variety of newer vehicles, this would showcase an issue since they have automatic brake adjusters. When driving, the brakes should not pull or make any noise. -
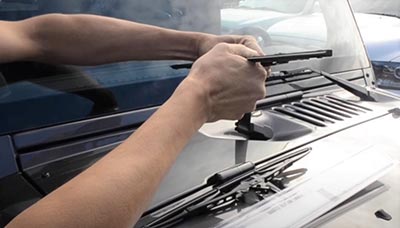
Windshield wipers and washers
Inspect the windshield wipers and washers. Touch the edge of the blade contacting with the windshield, it should not be hard or rough. Turn the wipers on and the washers too. Make sure the washers hit the windshield where needed and adjust them if necessary. The wipers should not streak. Observe the blade edge while it changes direction on the windshield, it is supposed to hinge back and forth. In case it does not, you will have to bend the wiper arm slightly, so it does. You should change the blades annually. Fill the washer fluid bottle with washer solvent. I also recommend using a product like Rain-X.

-
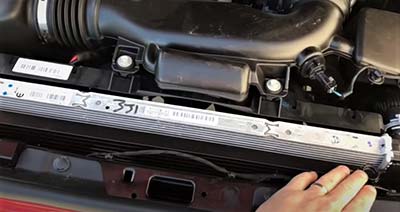
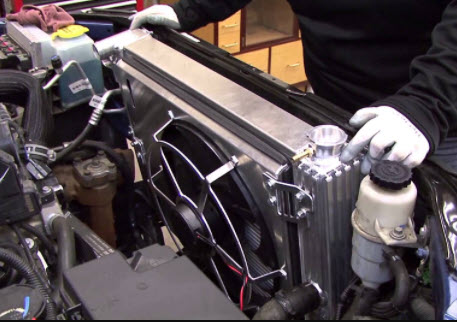
Radiator
Look through the grill to see the radiator. You may need a flashlight to see it well. You are looking for is any obstruction of airflow, like bugs or some foreign material sucked in a while going down the road. Most people clean out their radiators at the car wash. However, you should be careful if you do this. The high-pressure water can bend the fins of the radiator and lead to the loss of airflow and the overheating issue.

-
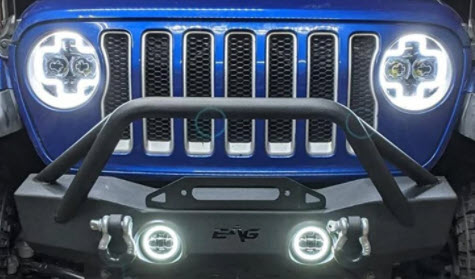
Lights

Turn all the lights on, including the emergency flashers. You may need an assistant to step on the brakes while you inspect your brake lights. Do not forget to check high and low headlights beams. -
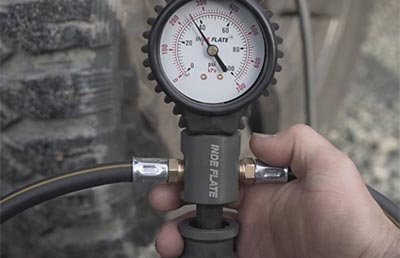
Tires
Inspecting the tires is not only a safety issue. It can save you a ton of money too. Begin with tire pressure. Most drivers have their own opinion as to what tire pressure to run, and it is usually too high. The pressure indicated on the sidewall of a tire is the maximum pressure at maximum load. If you run this pressure without a load, you will wear the tires out and also degrade the ride quality. There are countless variables to tire pressure. For instance, tire size, rim width, or vehicle weight. One of the best ways to get the correct pressure is to draw a chalk line across the tread and drive a block or less and see if it wears off evenly at the center or edges. If at the center there is too much pressure and the edges are not enough. The minimum highway pressure recommended by most manufacturers is 20 p.s.i. Your tire pressure should fall somewhere between the maximum pressure and this.

Pay attention to the current wear on your tires. Compare it with the front tires. If they are wearing on the outside, or your truck pulls to one side, then an alignment is required. On all four-wheel-drive vehicles, tire rotation is of high importance. You are supposed to rotate them every 5,000 miles or so to get maximum wear out of a set of tires. Another factor that affects tire wear is balance. Search for any missing wheel weights. In case you experience a steering shimmy or some other vibrations, then you should have your wheels balanced
-
Fan

Open the hood to check some of the engine compartments. Hold the fan and try to move it back and forth towards the front and rear of the vehicle. If there is any looseness, it could indicate bad water pump bearings. Further checking is required. Newer vehicles feature plastic fans, so you should be gentle. When experiencing overheating problems, you should check the viscous fan hub for signs of leakage. The finned aluminum center of the fan locks up the fan when the engine heats up. When it loses the silicone oil that is inside, oily streaks from the hub would indicate the problem, the fan will not cool the engine properly. -
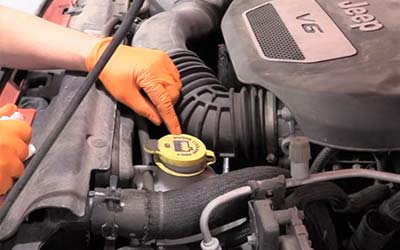
Antifreeze
It is a worthy idea to get an antifreeze tester and make sure the engine is protected down to 30 below zero. The antifreeze should be clean and free of rust. When adding antifreeze, a 50 / 50 mix is recommended. A concentrate of antifreeze can provoke a condition known as silicate dropout, and it can pluck up the radiator. A thin antifreeze mix can’t protect the engine properly.

-
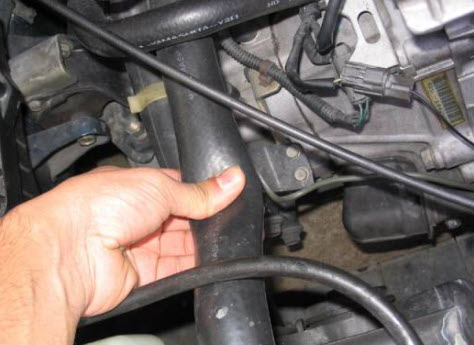
Hose condition

If your vehicle is over two years old, you should pay attention to the belts and hoses. New silicone hoses can last for a very long time, but you need to ensure they are not rubbing on anything. Inappropriate rubbing will lead to a blown hose when you expect it least. If there is a worn spot on the hoses, you can simply bind the hose with a nylon wire tie to eliminate the wear due to vibration. Should there be any bulging or soft spots on the upper or lower radiator hoses you, need to replace them. Also, if the hoses collapse after the engine cools down, this means they are too soft and should be replaced. -
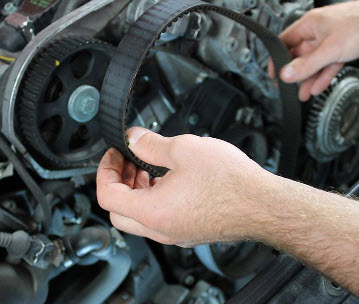
Belt condition

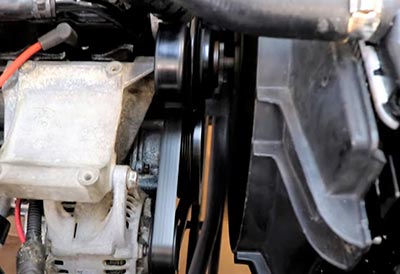
Inspect the belts with a flashlight and turn them over so that you can see the inside of the V. If you notice any sign of cracking, you should have them replaced. There are two main types of belts used today. The old V belt and the newer multi-groove belt or serpentine belt. As these belts wear, they require periodic adjustment. The rule of thumb for belt tightness without using a tension gauge is to push on the belt in between two pulleys with your finger. About 1\2″ of a movement pushing hard with one finger is expected. Should there be more than that, the belt should be adjusted.

Some of the multi-groove belts feature a tensioner that needs no adjustment. A spring-loaded arm that runs on the backside of the belt, keeping it tight. However, they can go bad too. If the belt squeals and has a tensioner, it should be checked further. Another problem to look for is a shiny surface on the inside of the V. It usually indicates an old belt. If you remove a belt with the condition, turn the pulleys that it drives, such as the alternator or smog pump. If they do not turn freely or you hear any bearing noise, you just might catch a breakdown before it happens.
-
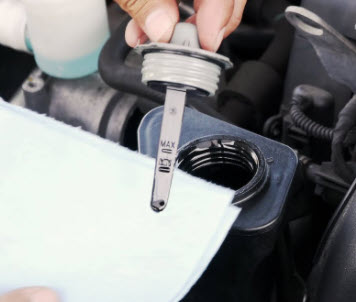
Power steering fluid
Inspect your power steering fluid. In case it is low, add the right fluid. Consult with the owner’s manual to not cause a system failure by adding the wrong fluid. -
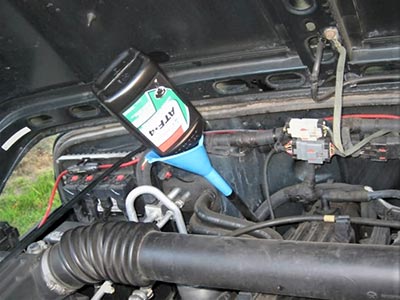
Automatic transmission fluid
With the engine running and in park set, inspect the automatic transmission fluid level. Check its color and smell. If it is dark and has a burnt smell, it requires further examination. You should change the oil and filter every 30,000 miles or so, according to the owner’s manual.

-
Oil and coolant leaks
Look around and under the engine and transmission area for any sign of leakage. Seepage and minor leaks may not be worth fixing, but at least you will have an idea as to the issue should it get any worse. If you come across a coolant leak, it should be fixed ASAP. This not only will save you from an unwanted breakdown but is an environmental issue as well.

-
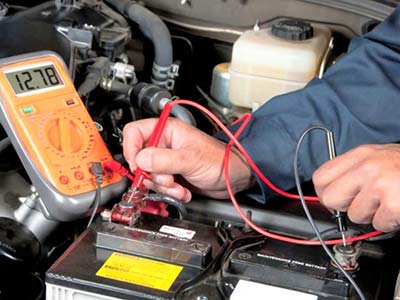
Battery
Make sure that the top of the battery is clean. A battery can lose its charge if there are dirt and debris between the positive and negative posts. In case there is corrosion on the battery posts, it should be cleaned off ASAP. You can use baking soda to break down the corrosion. Mix it with water and brush it on with an old paintbrush. Flush thoroughly with water until all the corrosion is gone. You can get some anti-corrosion rings or a battery post aerosol to eliminate corrosion from forming.
If you have a battery that allows you to check the electrolyte level, you should do so. Bring the level up to the full ring with distilled water. Newer batteries are sealed and have a condition eye. The eye should be either green or blue. In case it’s black, it indicates a low charge. If the eye is clear or yellow, the electrolyte is low, and the battery should be replaced. This may also be a sign that the regulator is overcharging the battery.
-
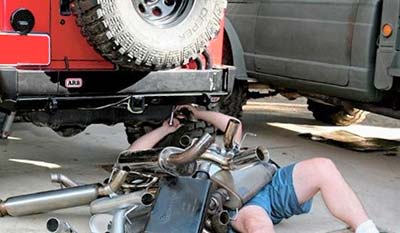
Exhaust system
Look over the exhaust system for any loose bolts, mountings, or cracks. Cracking around the muffler inlet or outlet is common. When seen on time, this could save you from losing part of the exhaust system on the road. A muffler on the side of a road is a quite common sign.

-
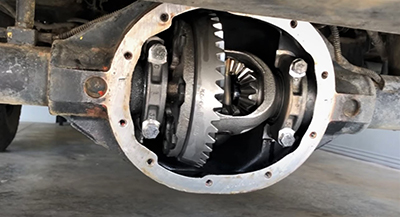
Transfer case, Transmission, and differential fluids check
You can check the condition of your transmission and axle gears by looking at the fluid. On the drive axles, the fluid is checked at the plug hole halfway up on the differential housing or cover plate. The oil level is just to the bottom of the hole. Put your finger in to get some oil on to see if there are any metal flakes in it. If there is any metal in the oil, this may lead the bearings to failure. When caught early, this can save you a lot of money, not to mention a breakdown. The metal comes from the gears put under a heavy load. Since there are no filters on these gearboxes, the only way to get rid of the metal flakes is to change the oil.

The same is true in the case of transmission and transfer. The oil should not smell or look burnt. If you add to or change the oils in the differentials, transmission, and transfer case, you should use the right oil. If you have a limited-slip rear end, you can even damage the friction plates by using regular 90 weight oil. Be very careful of the oil in the transfer case, some take A.T.F., but others use a heavier oil. If you notice that the transfer case is low and the transmission is overfilled, you might have an internal leak.
-
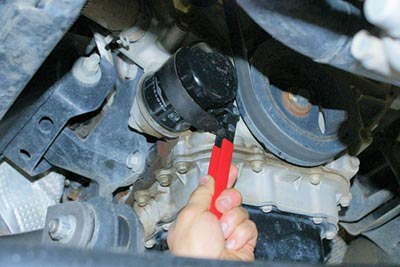
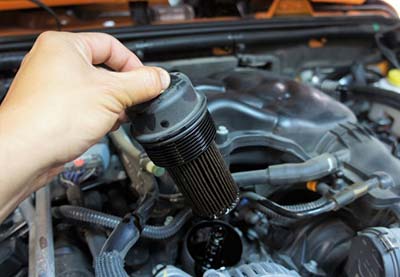
Change oil filter

-
Grease lube points
Now is the time to change the oil and oil filter. Always change the oil and filter at the same time. When you install the new filter make sure that the old filter’s o-ring came off with the filter and is not stuck to the filter housing. Take a rag and clean off the mating surface of the filter housing and coat the new filter o-ring with clean oil. When installing the new filter follow the tightening instructions on the filter. Check the owner’s manual for lube points to make sure you grease all the points that need grease.

-
Change fuel filter

-
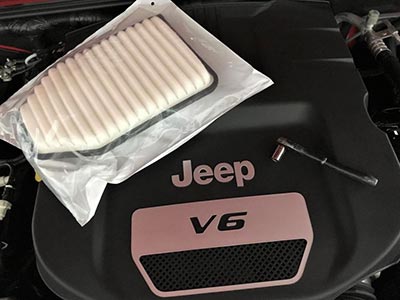
Change the air filter
Change the fuel and air filter at least once a year. If you drive on dusty roads this may have to be done more often.
-
Markdown service miles
Open your owner’s manual and mark down miles and dates to keep your eye for the next preventive maintenance.
-
Make P.M. reminder sticker
You need to keep records of when you do these services. In the owner’s manual, there is usually a place for this. You might also want to use some kind of a reminder sticker on the door jamb as well. Follow your owner’s manual for mileage intervals as to when to change the oil and perform a P.M. whenever you do.
As you get more familiar with your vehicle by doing these P.M.’s, you will learn when something is wrong. This will come in time, so the first time you check something that doesn’t seem right, don’t get too excited about it. Has it been checked by someone that knows and that you can trust? You can also call the dealer and talk to a service representative, they are usually willing to help. The more you do the more confidence you will become about doing your own maintenance. This will be a big help if you have problems in the backcountry
Add Comment