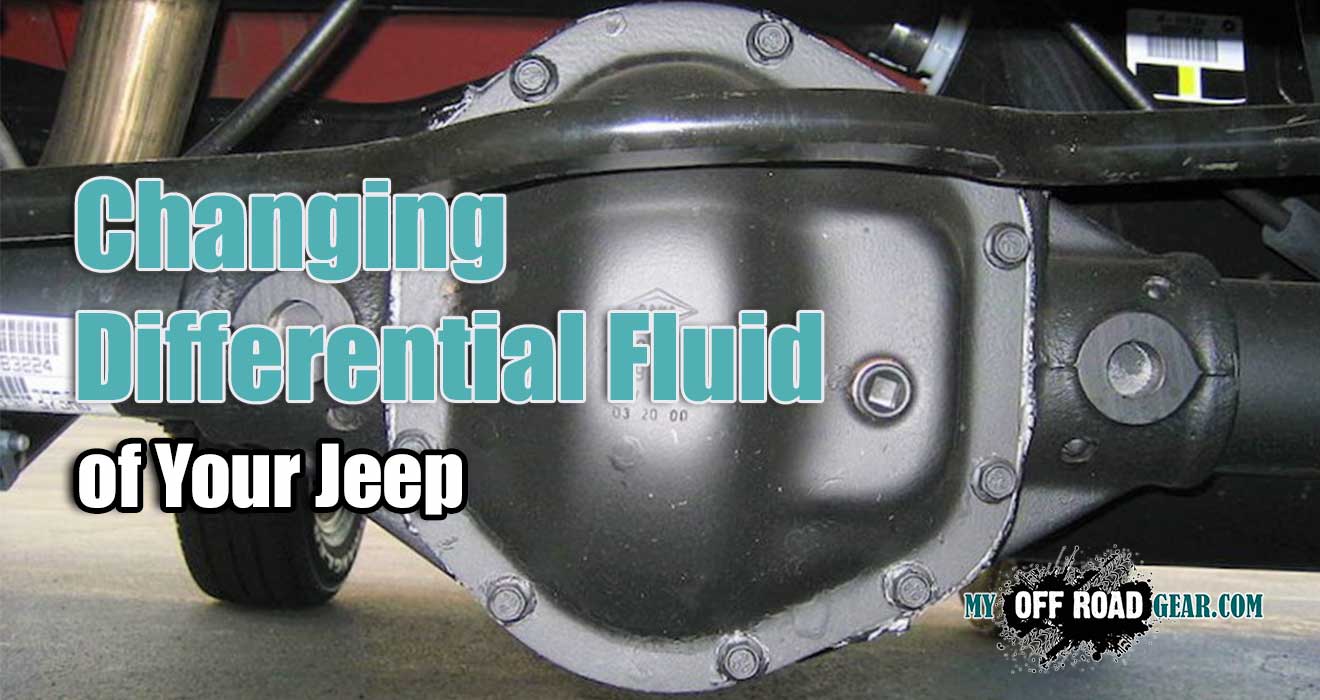
Time needed: 1 hour and 30 minutes
When it comes to maintaining your Jeep’s performance and ensuring its longevity, one crucial aspect that often gets overlooked is the differential fluid. The differential fluid plays a vital role in lubricating and cooling the gears inside the differential, which helps to reduce friction and wear. Regularly changing your Jeep’s differential fluid is a simple yet essential maintenance task that can save you from costly repairs down the road. In this comprehensive guide, we will walk you through the process of changing your Jeep’s differential fluid, step by step, ensuring that your Jeep continues to perform at its best.
This write-up describes the basics of changing your Jeep’s differential fluid, whatever model it might be. I took photos as I worked on my Dana 30, however, a Dana 44, Dana 35c axles, etc are all similar.
Why is Changing Your Jeep’s Differential Fluid Important?
Your Jeep’s differential is responsible for transferring power from the engine to the wheels. It contains a set of gears that allow the wheels to rotate at different speeds while turning corners. The differential fluid not only lubricates these gears but also helps to dissipate heat generated during operation. Over time, the differential fluid breaks down, becomes contaminated, and loses its effectiveness. If left unchanged, it can lead to increased friction, excessive heat, gear wear, and eventual damage to the differential itself.
Step-by-Step Guide to Changing Your Jeep’s Differential Fluid
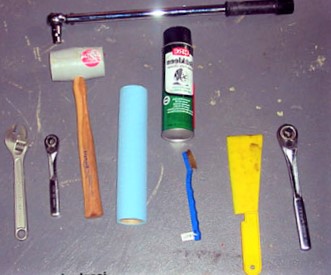
Tools and Materials You Will Need
This isn’t difficult and it’s certainly not beyond the capabilities of most people. If you can change your oil, then changing your diff fluid is easily within reach. I use the following tools:
- paper towels
- rubber mallet
- wrench
- torque wrench (nice to have, but not required)
- brake/carb cleaner
- wire brush
- gasket scraper
- drain pan
- funnel or another device to refill the differential
- gloves

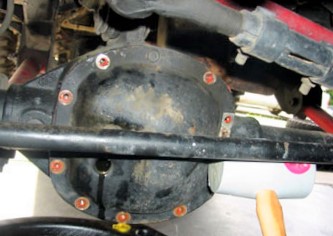
Prepare Your Work Area and Jeep
Gear oil is smelly stuff and you definitely do not want it on your driveway or garage floor. I lay down the newspaper and keep plenty of paper towels and cat litter handy. Begin by inspecting the differential cover and bolts. If anything is damaged beyond repair, now is the time to head to the parts store to buy replacements. I had a couple of bolts that lost a match to some rocks and were ground down. Of course, I didn’t discover this until late Sunday afternoon when most stores were closed. Oh well, better planning next time.

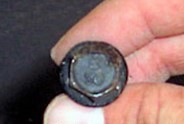
Remove the Fill Plug From the Cover
The plug is typically metal but the

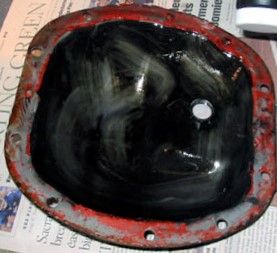
 You can use a screwdriver to carefully pry the cover off, but I use a rubber mallet to whack the side of the cover. Have a wide container under the differential to catch the gear oil that will come pouring out. Once you’ve broken the seal, allow the majority of the fluid to drain. You can then remove the retaining bolt and pull the cover off. Use a lint-free cloth, flushing oil, or light engine oil to clean the housing. Do not use water, steam, kerosene, or gasoline. Use a rag or paper towels to cover the differential.
Inspect the Cover for Rock Rash

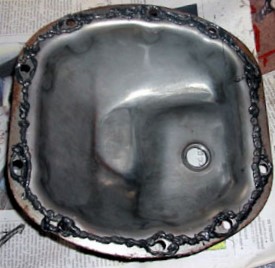
Removing The Gasket
Try to avoid using any sharp metal tools like screwdrivers. These are liable to damage the mating surfaces. I use a cheap plastic blade to scrape off the old gasket. I think it’s designed for bodywork, but it works for this purpose. It’s good for about four changes before it gets too chewed up, but at fifty cents a piece, I’m not complaining.
If you’ve previously installed a magnet on the cover or have a magnetic cover, inspect it for chunks of metal. Small particles are normal, but anything large is cause for concern.
Mount the Differential Cover

Once you’ve removed the old gasket, use paper towels to clean as much remaining oil and anything else that might have found its way inside the housing. Run a bead of your favorite brand of RTV around the mating surface of the cover. The Factory Service Manual (FSM) calls for a 1/4″ bead but I tend to use a little more. I got a little sloppy this time, but hopefully, you get the idea. Do not allow the RTV to set for more than five minutes before mounting the cover or you’ll need to remove it and reapply a new bead. Mount the cover being careful not to smear the RTV. Torque the cover bolts to appropriate specs.
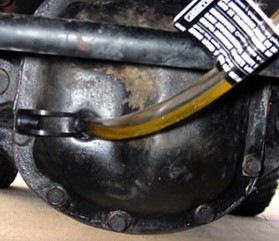
Adding Gear Oil

I usually allow the RTV to set for an hour or so before adding gear oil, but follow the directions on the tube. If your particular axle requires a friction modifier for limited-slip clutches, now is the time to add it.
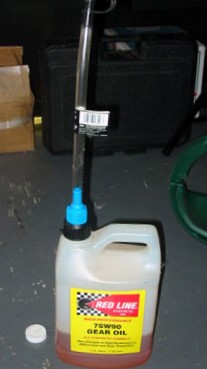
When you’re ready, add your axle’s favorite flavor of gear oil. You can use a pump or funnel to pour the fluid in through the fill hole. Somewhere in my travels, I picked up a nifty device the screws onto the bottle and has a hose long enough that’ll reach the diff. It also has an on/off valve. Fill the diff until fluid starts dripping out of the hole. Replace the plug.
Lift Your Jeep
Use a floor jack to lift your Jeep off the ground. Place jack stands underneath for added stability and safety.
Locate the Differential
The differential is typically located between the rear wheels of your Jeep. Consult your owner’s manual if you’re unsure about its exact location.
 You can use a screwdriver to carefully pry the cover off, but I use a rubber mallet to whack the side of the cover. Have a wide container under the differential to catch the gear oil that will come pouring out. Once you’ve broken the seal, allow the majority of the fluid to drain. You can then remove the retaining bolt and pull the cover off. Use a lint-free cloth, flushing oil, or light engine oil to clean the housing. Do not use water, steam, kerosene, or gasoline. Use a rag or paper towels to cover the differential.
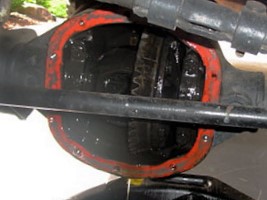
If you have a limited-slip diff, follow any directions that come with the friction modifier, but typically they recommend you drive a number of figure 8’s. Personally, I raise first one side of the Jeep and then the other to allow the fluid to settle within the housing. I then check the fluid level and add as required.
That’s it. You’re done. Now take your smelly old oil to your local recycling center.
Lower Your Jeep
Carefully lower your Jeep using the floor jack and remove the jack stands. Ensure that your Jeep is resting securely on the ground before proceeding.
Test Drive Your Jeep
Take your Jeep for a short test drive to ensure that the differential is functioning properly. Listen for any unusual noises or vibrations that may indicate a problem.
Check for Leaks
After the test drive, park your Jeep and inspect the area around the differential for any signs of leaks. If you notice any leaks, tighten the differential cover bolts further or seek professional assistance.
Disclaimer: This write-up is meant as a basic how-to article. Obviously, if you’ve swapped axles in your Jeep and you’re running something other than stock, you probably know how to change your diff fluid. For everybody else, here goes.
Conclusion
Changing your Jeep’s differential fluid is a vital maintenance task that ensures the smooth operation and longevity of your vehicle. By following the step-by-step guide outlined in this article, you can confidently tackle this task on your own and save money on costly repairs. Remember to refer to your Jeep’s owner manual for specific instructions and recommendations. With regular differential fluid changes, you’ll keep your Jeep running smoothly and ready to take on any adventure.
FAQs
How often should I change my Jeep’s differential fluid?
Ideally, you should change your Jeep’s differential fluid every 30,000 to 50,000 miles, or as recommended by the manufacturer. However, if you frequently engage in off-road driving, it’s advisable to change the fluid more frequently.
Can I use any type of differential fluid for my Jeep?
No, it’s crucial to use the specific type of differential fluid recommended by your Jeep’s manufacturer. Different Jeeps may require different types of fluids, so consult your owner’s manual or seek professional advice.
Can I change the differential fluid myself, or should I seek professional help?
Changing the differential fluid is a relatively simple task that most DIY enthusiasts can tackle. However, if you’re not confident or comfortable performing the task, it’s always best to seek the assistance of a professional mechanic.
What are the signs of low or contaminated differential fluid?
Signs of low or contaminated differential fluid include increased noise, vibrations, difficulty in turning, or a burning smell. If you notice any of these symptoms, it’s essential to check and change the differential fluid as needed.
Can I reuse the old differential fluid?
Reusing the old differential fluid is not recommended. It may contain contaminants and debris that can cause damage to your Jeep’s differential. Always use fresh, clean fluid when performing a fluid change.
Can I overfill the differential with fluid?
Overfilling the differential with fluid can lead to excessive pressure and cause leaks. It’s essential to follow the manufacturer’s recommended fluid capacity and not exceed it.
Add Comment